Have you ever been mid-project, only to realize your current drill bit isn’t up to the task? With a variety of bits designed for different materials and sizes, choosing and replacing them is an essential skill every DIY enthusiast or professional should master.
This blog post provides step-by-step instructions on how to change a drill bit, ensuring that swapping out drill bits becomes second nature. So let’s roll up our sleeves and get these drills in top shape!
Types of Drill Chucks
There are two main types of drill chucks: keyless chuck and keyed chuck.
Keyless Chuck
A keyless chuck revolutionizes the process of swapping drill bits, providing greater convenience and efficiency. This type of chuck relies on manual force to open and close the jaws, holding the bit firmly in place.
To replace a drill bit with a keyless chuck, begin by unplugging the tool for safety reasons. Then turn your power drill’s directional switch into reverse or counter-clockwise position while gently squeezing the trigger to loosen its grip on the old bit.
Once loose enough, you can easily remove it from its grasp and insert your new chosen bit. With this done, ensure that it sits well-aligned within the jaws of your keyless chuck before manually tightening it down for secure use in upcoming tasks.
After ensuring that everything is adequately tightened and in place, running your drill briefly ensures optimal performance as long as there is no wobble or give away observed from your newly installed drill bit.
Keyed Chuck
To change a drill bit with a keyed chuck, start by unplugging the power tool for safety. Then, insert the wrench into the chuck and twist it to open the jaws. With the jaws open, remove the old drill bit by pulling it out of the chuck.
Next, align the new drill bit with the chuck and insert it until it is secure. Finally, use the wrench again to twist and close the jaws of the chuck, ensuring that they are tightened securely around the new bit.
Remember to always disconnect your drill from its power source before attempting to change a drill bit.
Rockler offers expert tips on how to change a drill bit with a keyed chuck. They recommend using proper alignment when inserting and securing the new bit in order to prevent any accidents or damage during operation.
Collet
A collet is another type of chuck commonly found on routers and some power drills. It consists of a metal sleeve with slots that grip the bit tightly when tightened down. To change a drill bit with a collet, you need to loosen it first by twisting the collet nut counterclockwise using a wrench or by hand if it’s designed for finger-tightening.
Once the collet is loose, you can remove the old drill bit and insert a new one by aligning it with the slots in the collet and pushing it in until it’s secure. Finally, tighten the collet nut clockwise to secure the new bit in place before using your drill again.
Remember to always unplug your tool before changing any drill bits!
How to Change a Drill Bit with a Keyless Chuck
To change a drill bit with a keyless chuck, switch the drill into the counter-clockwise position and gently squeeze the trigger to loosen the old bit. Then, insert the new bit and tighten securely in place.
Switch the drill into the counter-clockwise position
To change a drill bit, start by switching the drill into the counter-clockwise position. This will allow you to loosen and remove the current bit from the chuck. By turning it in this direction, you’ll be able to quickly and easily release the old bit without any hassle.
Remember to always switch off and unplug your drill before attempting to change the drill bit for safety purposes.
Gently squeeze the trigger
Gently squeeze the trigger to activate the drill. This will allow the chuck to rotate and secure the drill bit in place. Make sure to hold onto the drill firmly while squeezing the trigger, keeping a steady grip.
Insert the new bit and tighten
To install the new drill bit, align it with the chuck and push it in until it is secure. Make sure the bit is properly inserted so that it doesn’t come loose while drilling. After inserting the bit, tighten the chuck by rotating it in a clockwise direction until it feels snug.
This will ensure that the bit stays securely in place during use. Take care not to overtighten the chuck, as this can damage both the drill bit and the chuck itself. Remember to always double-check that the drill is unplugged before changing or tightening a drill bit for safety reasons.
How to Change a Drill Bit with a Keyed Chuck
To change a drill bit with a keyed chuck, unplug the tool and fit the wrench in the chuck. Twist the key to open the chuck, insert the new bit, and twist the chuck closed. It’s important to follow these steps carefully to ensure proper installation of your drill bit.
Keep reading to learn more about changing drill bits with different types of chucks.
Unplug the tool and fit the wrench in the chuck
To change a drill bit with a keyed chuck, start by unplugging the tool for safety. Then, grab the wrench that came with your drill and fit it into the chuck. Twist the key in the chuck to open it up and release the current bit.
Once you’ve removed the old bit, simply insert the new one and twist the chuck closed using the wrench. Remember to tighten it securely so that your new bit stays in place during use.
Twist the key to open the chuck
To open the chuck on a drill with a keyed chuck, simply grab the appropriate-sized wrench and twist the key. This will loosen the chuck, allowing you to remove or replace the drill bit.
It’s important to remember to unplug the drill before attempting this step for safety reasons. Once you have twisted the key and opened the chuck, you can easily insert a new bit by aligning it with the chuck and pushing it in until it is secure.
Insert the new bit and twist the chuck closed
Align the new drill bit with the chuck and push it in until it is secure. Then, twist the chuck closed to ensure a tight grip on the drill bit.
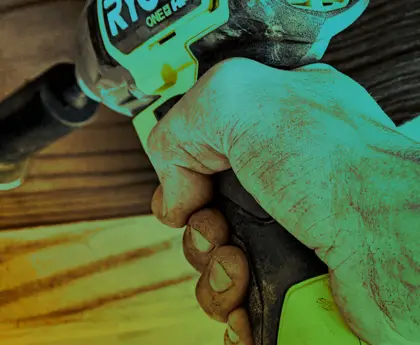
How to Change a Drill Bit on an Impact Driver
To change a drill bit on an impact driver, grip the base of the chuck and pull it forward to release the current bit. Then, simply place the new bit into the chuck and pull it forward again to seat it securely in place.
Grip the base of the chuck and pull
To change a drill bit on an impact driver, simply grip the base of the chuck and pull. This will loosen the chuck and allow you to remove the old bit. Then, you can easily place the new bit into the chuck and pull it forward to seat it securely.
It’s a quick and effortless process that ensures your drill is always ready for whatever task comes next.
Place the new bit in the chuck
Insert the new drill bit into the chuck, ensuring it is properly aligned. Push it in until it is secure and snugly fitted in place. Double-check that the bit is centered within the chuck to ensure optimal performance.
Once you have placed the new bit in the chuck, you’re ready to move on to the next step of your drilling task without any further delay.
Pull the chuck forward to seat the bit
Pulling the chuck forward is the final step in changing a drill bit on an impact driver. This action securely seats the new bit in place, ensuring it is properly aligned and ready for use.
By pulling the chuck forward, you can confidently tighten it down and start drilling with your newly installed drill bit. Just remember to grip the base of the chuck firmly before pulling it forward to avoid any accidents or slippage.
How to Change a Drill Bit FAQs
1. How do I know when it’s time to change a drill bit?
You may need to change a drill bit if it becomes dull, damaged, or if you need a different size or type of bit for your project.
2. What tools do I need to change a drill bit?
To change a drill bit, you will typically need a chuck key (if your drill has one), pliers or wrenches (depending on the type of chuck), and the new drill bit that you want to replace the old one with.
3. How do I safely remove an old drill bit?
First, make sure the power is turned off and unplug any corded drills. If using a cordless drill, remove the battery. Then, use the chuck key or pliers/wrenches to loosen and unscrew the old drill bit from the chuck in a counterclockwise motion.
4. How do I install a new drill bit?
To install a new drill bit, align the shank of the new bit with the jaws of the chuck and insert it as far as it will go. Use either your hand or tools (such as pliers) to tighten the chuck securely around the new bit in a clockwise direction. Make sure it is firmly tightened before operating your drill again.
Conclusion: How to Change a Drill Bit
Fact is, changing a drill bit is a simple process that can be done with a few easy steps. Whether you have a keyless chuck, keyed chuck, or an impact driver, following the proper procedure will ensure a smooth and successful swap of your drill bits.
Remember to always prioritize safety by disconnecting the power source before making any changes. With these tips in mind, you’ll be able to tackle any drilling project with ease!