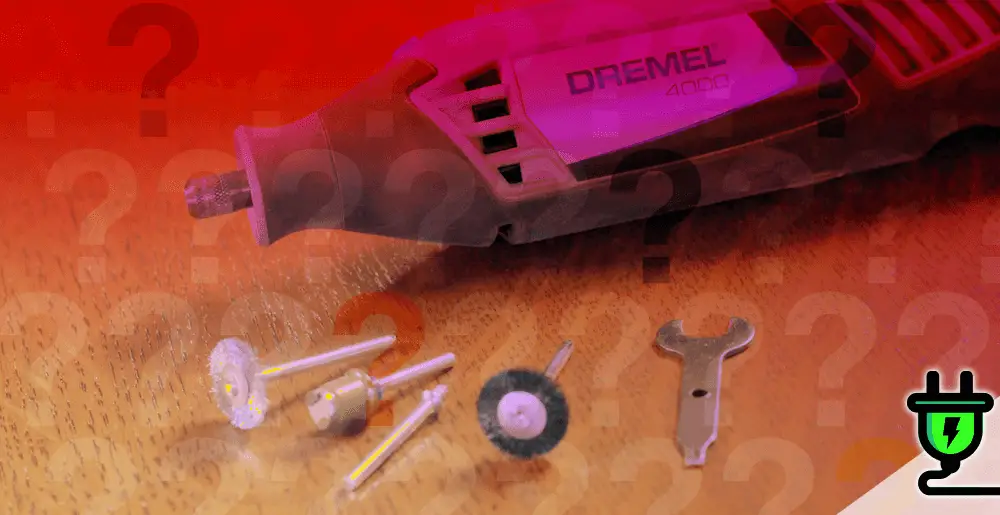
Are you looking to change the bit on your Dremel tool but unsure how to go about it? You’re not alone, as this is a common issue encountered by many Dremel users. Simply put, how to change bit on Dremel is a simple and straight forward process.
To change the bit on a Dremel, first, make sure it is turned off and unplugged. Then, loosen the collet nut with a wrench or collet nut tool, remove the old bit, insert the new bit into the collet, and tighten the collet nut securely.
This resourceful guide will walk you through each step of replacing a Dremel bit with ease and accuracy.
Keep reading for vital tips that smartly tackle your problem and ensure safe, effective use of your versatile Dremel tool!
Steps to Change a Bit on a Dremel
To change a bit on a Dremel, start by unplugging the tool and then locate and hold the spindle lock button.
Unplug the Dremel from the power source
Before you start, make sure your Dremel is not plugged in. This step keeps you safe from shock or a sudden start of the tool. You have to unplug it first. Even if the power switch is off, still unplug it from where it gets its power.
Safety comes first when doing this job. So take care!
Locate and hold the spindle lock button
To change the bit on a Dremel, you first need to locate and hold the spindle lock button. This button is usually located near the front of the tool, close to where the bit is inserted.
It’s important to hold this button down firmly as it prevents the spindle from rotating while you loosen or tighten the nut. By holding down the spindle lock button, you can safely and easily change your Dremel bit without any issues.
Loosen the nut by turning it counterclockwise
To loosen the nut on your Dremel, turn it counterclockwise. You can do this by using a wrench or the wrench that comes with the Dremel tool. Turning the nut counterclockwise will allow you to remove the old bit and replace it with a new one.
Make sure to hold onto the spindle lock button while loosening the nut to prevent the spindle from rotating. Remember to tighten the nut securely after inserting the new bit to ensure it stays in place during use.
Remove the old Dremel bit
To remove the old Dremel bit, start by unplugging the tool to ensure safety. Then, locate and hold the spindle lock button so that the spindle doesn’t rotate. Next, loosen the nut by turning it counterclockwise using a wrench or the appropriate Dremel tool’s wrench.
Once the nut is loose, you can simply remove the old Dremel bit from the collet.
Insert the new Dremel bit
To insert a new Dremel bit, first make sure the tool is unplugged. Hold down the spindle lock button to keep the spindle from rotating. Then, loosen the nut by turning it counterclockwise with a wrench or the Dremel tool’s wrench.
Once loose, remove the old bit and carefully insert the new one into the collet until it is secure. Finally, tighten the nut by turning it clockwise until snug. Make sure it’s tight so that the bit doesn’t come loose during use.
Tighten the nut by turning it clockwise
To secure the new Dremel bit in place, you need to tighten the nut. Use a wrench or the Dremel tool’s wrench to turn the nut clockwise. Make sure to tighten it until it feels snug and secure.
This will prevent the bit from coming loose while you’re using your Dremel tool. It’s important to ensure that the nut is tightened properly before proceeding with your project.
Tips and Recommendations for Changing Dremel Bits
Consider the appropriate bit size for your project, use a Dremel Multi Chuck for easier bit changing, and explore recommended Dremel tools, bits, and attachments. Discover these helpful tips to enhance your experience with changing Dremel bits.
Consider the appropriate bit size for your project
When changing the bit on your Dremel, it’s important to consider the right size for your project. Different tasks require different sizes of bits, so you want to make sure you have the one that will work best.
If you’re not sure what size to use, check the instructions or research online for guidance. Using the right size bit will ensure that you can complete your project efficiently and effectively.
Use a Dremel Multi Chuck for easier bit changing
To make changing Dremel bits even easier, you can use a tool called the Dremel Multi Chuck. This handy accessory allows you to quickly and effortlessly switch between different bits without the need for a wrench or additional tools.
Simply insert the chuck into your Dremel tool, twist it to tighten, and then insert your desired bit. With the Multi Chuck, changing Dremel bits becomes a breeze, saving you time and effort in your projects.
Recommended Dremel tools, bits, and attachments
When it comes to Dremel tools, there are a variety of recommended bits and attachments that can enhance your projects. Some popular options include diamond-tipped bits for cutting hard materials like glass or tile, sanding bands for smoothing surfaces, and grinding stones for shaping and sharpening.
Additionally, you may want to consider attachments like the Flex Shaft attachment for better maneuverability or the Right Angle Attachment for accessing tight spaces. By choosing the right tools, bits, and attachments, you can make your Dremel even more versatile and efficient for different tasks.
Safety Precautions When Changing Dremel Bits
Always unplug the Dremel before changing the bit to prevent any accidental power activation. Handle both the Dremel and the nut with caution to avoid injury, and be careful not to overtighten the nut as this can cause damage to the tool or bit.
Always unplug the Dremel before changing the bit
To change the bit on your Dremel, it is important to always unplug the tool first. This will ensure your safety and prevent any accidents. By unplugging the power source, you eliminate the risk of electric shock or injury while handling the bit and making changes.
Remember to prioritize your safety and unplug the Dremel before proceeding with changing the bit.
Handle the Dremel and the nut with caution
Handle the Dremel and the nut with care to prevent any accidents or damage. Make sure that the Dremel is unplugged before handling it. Hold the tool firmly and securely while changing the bit to avoid dropping or mishandling it.
When loosening or tightening the nut, use gentle but firm pressure to avoid overtightening or stripping it. It’s important to handle these parts carefully to ensure smooth and safe bit changes on your Dremel tool.
Avoid overtightening the nut
When tightening the nut on your Dremel after changing the bit, be careful not to overtighten it. Overtightening can cause damage to the collet and make it difficult to remove the bit in the future.
Instead, tighten the nut until it is snug and secure. This ensures that the bit stays in place during use without putting unnecessary pressure on the tool. Remember, a properly tightened nut will prevent any wobbling or loosening of the bit as you work on your project.
So take your time and find that perfect balance when tightening the nut – not too loose, but not too tight either.
Troubleshooting Tips for Changing Dremel Bits
If you encounter a stuck bit in the collet or nut, try tapping the Dremel lightly to dislodge it.
Stuck bit in collet or nut
If you’re having trouble removing a bit from your Dremel tool’s collet or nut, don’t worry! This can happen sometimes. One way to solve this is by gently tapping the nut with a hammer to loosen it.
Another method is to use pliers or wrenches for extra grip and leverage. Just make sure to hold onto the bit securely while doing this. If these methods don’t work, applying some lubricating oil can help loosen the stuck bit.
Remember to always be careful when trying to remove a stuck bit and take your time.
Stuck collet inside the nut
If you find that the collet is stuck inside the nut when changing your Dremel bit, it can be frustrating. One way to solve this issue is by using pliers to grip onto the collet and carefully wiggle it out of the nut.
Another option is to use a small hammer or mallet to gently tap on the side of the nut while holding it securely. This might help loosen the collet and allow you to remove it from the nut.
Remember, always handle tools with caution and ensure that you have a firm grip while attempting to resolve this issue.
Bit does not fit inside the Dremel
If the bit does not fit inside your Dremel, there are a few things you can try. First, make sure that you have the correct size bit for your Dremel model. Different models may require different sizes of bits.
If you have the correct size but it still doesn’t fit, check if there is any debris or dust in the collet or on the bit itself. Clean out any dirt or debris and try again. If it still doesn’t fit, there might be an issue with either the collet or the bit itself.
In this case, it’s best to consult the manufacturer’s instructions or contact customer support for assistance.
How to change bit on Dremel FAQs
Can I use any type of bit with my Dremel?
No, it’s important to use bits specifically designed for your Dremel model. Different bits have different shank sizes and shapes that may not be compatible with your machine.
What should I do if I can’t loosen the collet nut to change the bit?
If you’re having difficulty loosening the collet nut to change the bit on your Dremel, try using a wrench or pliers for extra leverage. If it still won’t budge, consult your user manual or contact customer support for assistance.
Do I need any special tools to change the bit on my Dremel?
Most Dremel models come with a wrench or collet nut tool that is specifically designed to help you change bits easily. If you don’t have these tools, they can usually be purchased separately from hardware stores or online retailers.
Conclusion: How to change bit on Dremel
Changing the bit on a Dremel is a simple process that can be done in a few easy steps. By following the proper technique and safety precautions, you can quickly replace old bits with new ones and continue working on your projects with ease.
Remember to always unplug the tool before changing the bit, hold the spindle lock button, and tighten the nut securely. With these instructions in mind, you’ll be able to switch Dremel bits like a pro!


